
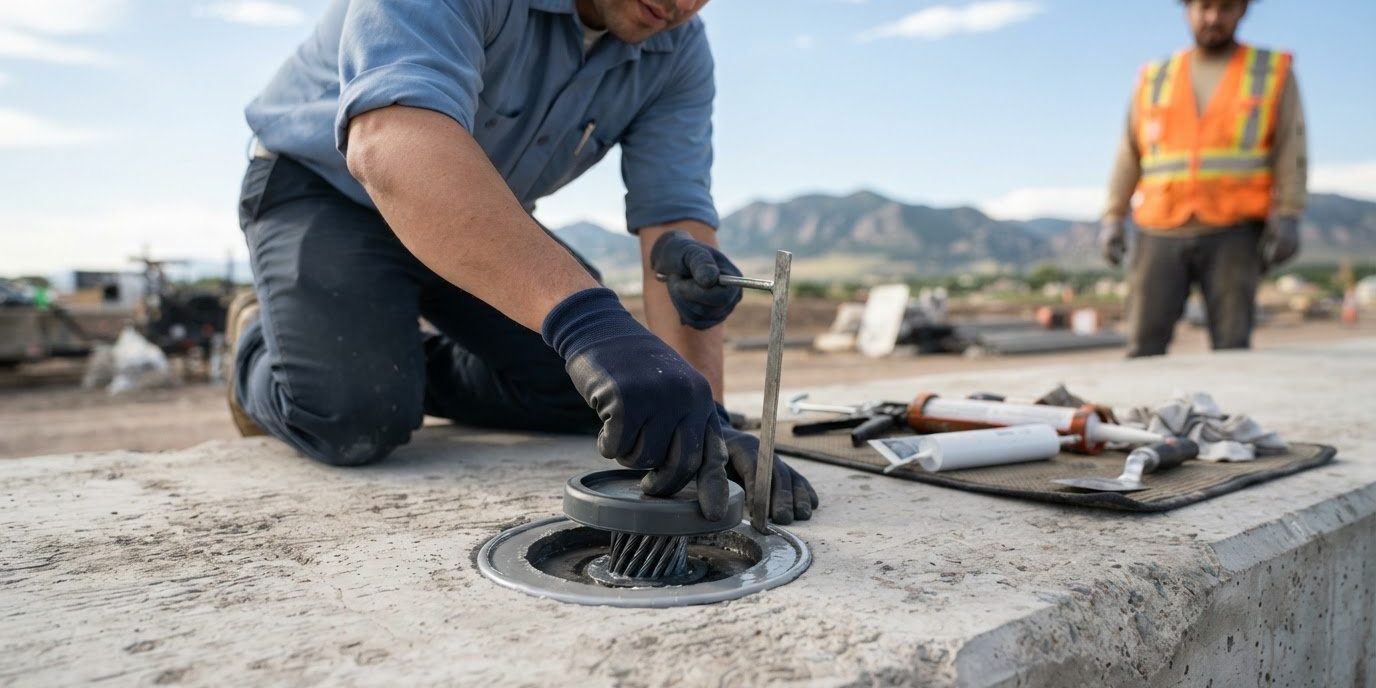
For post tension cable grease cap replacement in Wheatridge, the key concern is whether the cap is seated correctly and the pocket is sealed. A cap can look secure without forming a reliable seal. During installation, two-part epoxy is applied around the plug’s entire circumference before it is pushed flush with the slab.
The replacement cap matters, but so do its fit and seal. This guide covers how watertight sealing and a grease cap checker support the work, what the replacement process involves, and which tools prepare the pocket for a consistent fit. It also explains when a structural repair professional can assess the surrounding concrete and related concerns.
Key Takeaways
- A reliable seal depends on preparing the pocket and applying epoxy around the plug’s full circumference before seating it flush.
- Understand how a grease cap protects the tendon end and why correct seating matters for the surrounding system.
- Use a grease cap checker to verify seating, and prepare the pocket carefully to support a consistent fit.
- If damaged or uneven concrete surrounds the repair area, concrete repair or leveling may help address the related surface condition.
Watertight sealing at tendon stressing ends
A stressing-end seal protects the exposed tendon anchorage and surrounding pocket. Its reliability depends on correctly fitted encapsulation components and a verified cap seat.
Stressing-End Encapsulation Components
The assembly can include a pocket former, metal ring, plug, epoxy, and grease cap. The GTI Zero Void metal-ring pocket former is available at a 30-degree angle. Its metal ring groove protects encapsulation from oxyacetylene torch heat and helps gauge installation depth. During installation, two-part epoxy goes around the plug’s full circumference before the plug is pushed flush with the slab.
For projects in Wheat Ridge, applicable code provisions and permit review depend on the work’s scope, particularly whether repairs affect tendon, anchorage, or concrete elements. Establish the permit path before work begins, based on the structural scope.
Grease Cap Function and Replacement Materials
The grease cap covers the tendon end and helps protect the stressing-end assembly from water entry. Replacement materials must suit the pocket and let the plug seat evenly. A reaming tool with diamond-plated teeth roughens the pocket interior, removes grease coating, and creates a uniform circumference. This preparation helps the sealing material make consistent contact.
Some cordless right-angle drill setups allow reaming at a 45-degree angle after formwork removal. A grease cap checker then verifies that the cap is properly seated. These steps focus on preparation and fit, rather than forcing a cap into a pocket that remains coated or uneven.
Risks of Damaged or Missing Caps
A damaged or missing cap can leave the tendon end and anchorage exposed to moisture. Water entering the pocket can compromise the protective seal and contribute to deterioration around the stressing end. Look for a displaced cap, visible gaps, or damaged surrounding concrete, as these may indicate that the encapsulation needs attention.
When comparing post-tension repair contractors near Wheat Ridge, consider whether the scope covers pocket preparation, sealing materials, and cap-seat verification. A clear repair method explains how the surface is prepared, how the plug is sealed, and how seating is checked. These details help protect the stressing end from water entry.
What is a post-tension cable grease cap and what does it do?
A post-tension cable grease cap covers the tendon’s stressing end, where the steel strand and anchorage meet the slab pocket. It helps shield the encapsulated area from water and debris. The cap is separate from the wedge that anchors the strand and the grout plug that closes the pocket. Each component serves a different purpose, so the replacement must match the existing assembly.
For example, a GTI 0.5-inch two-piece wedge is listed with a length of 1.2 inches. Those dimensions describe a wedge, not a grease cap; confusing the parts can lead to a poor fit. The cap’s condition and seating determine whether it covers the stressing end as intended. A cap that is cracked, displaced, or missing leaves the protective assembly incomplete and calls for closer inspection of the pocket.
The closure may also include a post-tension plug made from non-shrink, non-metallic grout. The plug has a compressive strength of 8000 PSI at 28 days, complies with ASTM C-1107, and provides 1 inch of coverage. These details describe the plug material and coverage, not the cap itself. Keeping the distinction clear helps identify which part needs replacement and which parts remain in place.
During an assessment, identify the cap, wedge, anchorage, and pocket separately. Look for visible displacement, damage, or an uneven fit around the end. A grease cap checker can verify seating after installation, while the surrounding encapsulation indicates whether the protective assembly is intact. These checks help distinguish a cap problem from damage to another stressing-end component before repairs proceed.
What are the steps for replacing a post-tension cable grease cap safely?
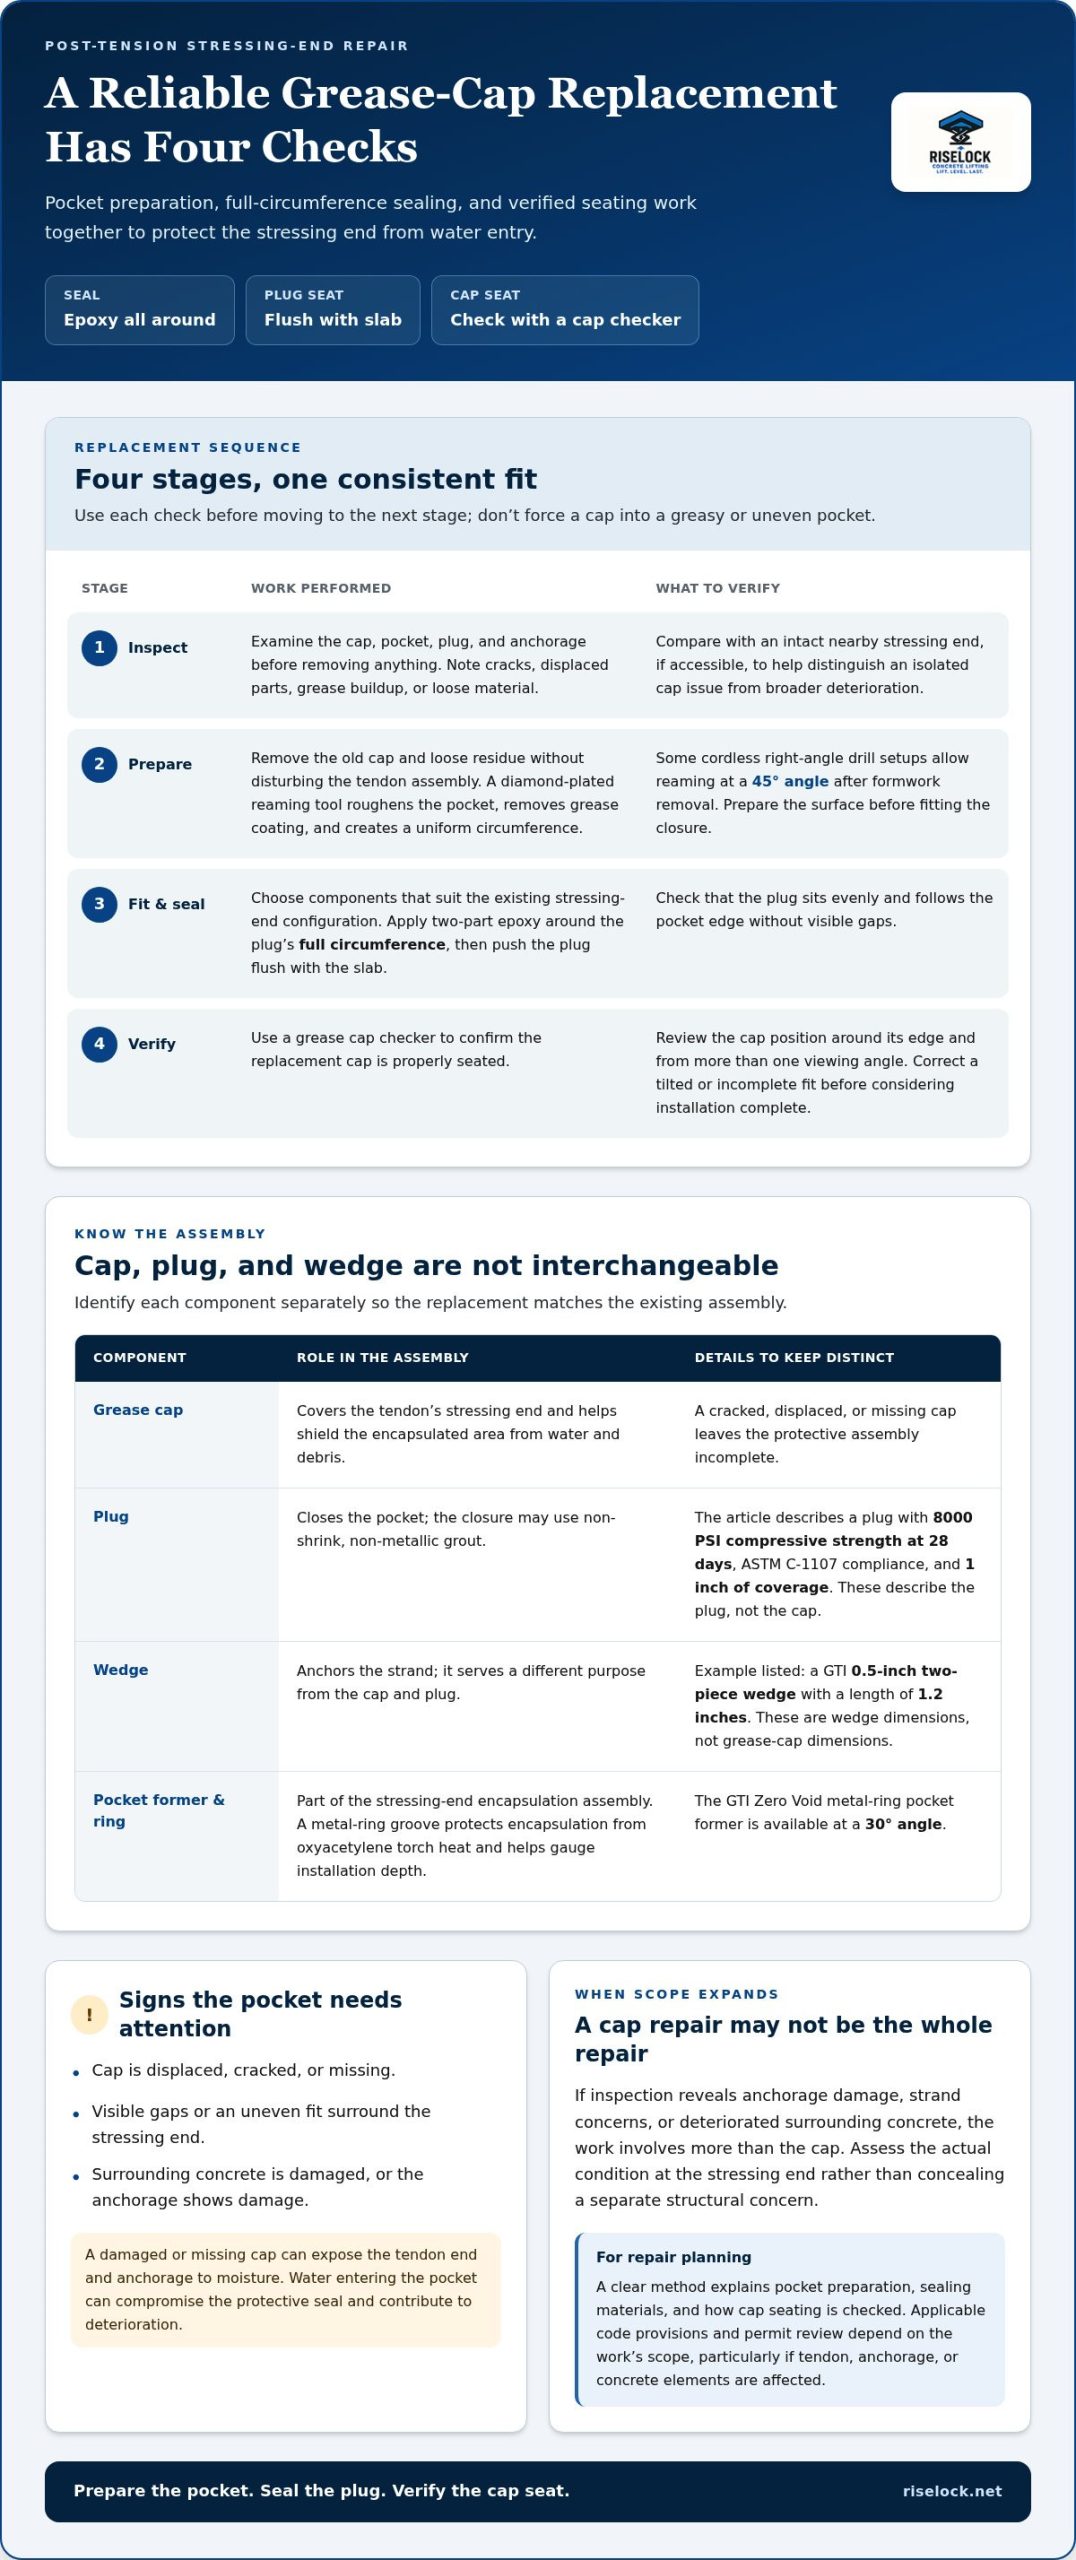
Use a controlled sequence: inspect the stressing end, prepare the pocket, fit compatible parts, and confirm the cap seat. For post-tension cable grease cap replacement in Wheat Ridge, the visible condition helps establish whether the work is limited to the cap or involves nearby components too.
- Inspect the assembly. Examine the cap, pocket, plug, and anchorage before removing anything. Look for cracks, displaced parts, grease buildup, or loose material. Record what is visible and compare the affected end with an intact nearby stressing end, if one is accessible. This comparison can help distinguish an isolated cap problem from broader deterioration.
- Prepare the pocket. Remove the old cap and loose residue without disturbing the tendon assembly. Use a reaming tool with diamond-plated teeth to roughen the pocket, remove grease coating, and create a uniform circumference. A cordless right-angle drill setup can support access after formwork removal, with reaming performed at a 45-degree angle.
- Fit the closure components. Select parts that suit the existing stressing-end configuration. Apply two-part epoxy around the plug’s full circumference, then push the plug flush with the slab. Check that the plug sits evenly and that the closure follows the pocket edge rather than leaving visible gaps.
- Verify cap seating. Use a grease cap checker to confirm the replacement cap is properly seated. Review its position around the edge, not just from one viewing angle. If it appears tilted or incomplete, correct the fit before considering the installation complete.
Don’t force a cap into a greasy or uneven pocket. Prepare the surface first, and keep the plug and cap aligned with the assembly’s intended arrangement. If inspection reveals anchorage damage, strand concerns, or deteriorated surrounding concrete, the repair involves more than the cap. Post-tension cable grease cap replacement in Wheat Ridge should address the actual condition at the stressing end, not conceal a separate structural concern.
What tools and materials are needed to replace a post-tension grease cap?
The work requires equipment suited to the pocket, not just a replacement cap. A reaming tool prepares the interior, a compatible plug and epoxy close the pocket, and a grease cap checker verifies final seating. Each tool serves a specific purpose, so choose equipment to suit the existing stressing-end assembly and avoid a mismatched fit.
The reaming tool’s diamond-plated teeth roughen the pocket interior, remove grease coating, and create a uniform circumference. A cordless right-angle drill can help with access after formwork removal. The angle and available working space affect tool positioning, but the goal is an even pocket surface. Removing the old cap and loose residue also helps reveal the surrounding concrete’s condition.
- Reaming tool: prepares the pocket and removes grease from its interior.
- Right-angle drill: powers reaming where access requires an angled setup.
- Two-part epoxy: seals around the plug’s full circumference during installation.
- Grease cap checker: verifies the cap’s seated position after fitting.
Materials must suit the closure design. The plug may use non-shrink, non-metallic grout, while the grease cap must match the stressing-end configuration. Keep the plug, cap, and anchorage components distinct during inspection because they perform different functions. Replacing the cap will not correct a damaged anchorage or deteriorated concrete around the pocket.
Before starting, organize the cap, plug, epoxy, reaming tool, drill, and checker. Confirm that the pocket can be prepared without disturbing the tendon assembly. If it remains greasy or irregular after reaming, address the surface before fitting the closure. This sequence connects tool choice with sealing quality and final inspection.
For help addressing concrete concerns around a stressing-end pocket, explore concrete repair options.
RiseLock Concrete Lifting: Polyurethane Concrete Lifting
RiseLock Concrete Lifting can help when uneven concrete near a post-tension repair is a separate surface concern. Its polyurethane concrete lifting service raises settled concrete, while the grease cap and stressing-end assembly require separate attention. This service may suit a sunken walkway or slab beside the repair, but it is not a substitute for inspecting or replacing a cap.
When the concrete itself is damaged, concrete repair may suit the condition. For an uneven surface, concrete leveling may be appropriate. The right service depends on whether the issue concerns tendon protection, the concrete surface, or both. Keeping these concerns distinct helps define the work.
Contact RiseLock Concrete Lifting to discuss concrete concerns around your post-tension repair.
Plan the Next Step for Your Structure
Before arranging post-tension cable grease cap replacement in Wheat Ridge, determine whether the concern is limited to the stressing end or part of a wider structural project. A cap issue and a concrete surface problem call for different assessments, so define each scope clearly. For projects involving a post-tension system beyond cap maintenance, RiseLock Concrete Lifting provides post-tension installation.
Note the visible condition, where the affected area is, and any known changes to the surrounding slab. These details help focus the discussion on the structural work required. RiseLock Concrete Lifting also handles related slab concerns, so the next step can address the specific condition rather than treating every issue as cap replacement.
Start a conversation with RiseLock Concrete Lifting about your project and the right direction for the work. A clear plan begins with understanding the condition in front of you, and you can move forward with greater confidence.
Frequently Asked Questions
How can you tell when a post-tension grease cap needs replacement?
A cap may need replacement if it is visibly cracked, loose, displaced, or missing. Compare its outline and position with nearby intact stressing ends, if available, to spot changes in profile. A crack in nearby concrete does not by itself prove cap failure, but it warrants attention alongside the cap’s condition. Avoid pulling or probing the assembly during a visual inspection.
Who repairs post-tension cables and grease caps in Wheat Ridge or Denver?
Post-tension repair contractors near Wheat Ridge can address the pocket, sealing materials, and cap-seat verification. A structural repair professional can assess damage to the anchorage or surrounding concrete.